The ATMEGA328-PU microcontroller is a cornerstone in the world of electronics, serving as the brains behind the widely popular Arduino Uno board. This versatile and powerful microcontroller is favored by hobbyists and professionals alike for its simplicity, robustness, and the extensive support provided by the Arduino community. Understanding the ATMEGA328-PU's features, including its programming capabilities, I2C communication, and pin layout, is essential for anyone looking to dive into electronics projects or enhance their knowledge of microcontroller programming.
ATMEGA328P Programming Essentials
Programming the ATMEGA328P is an accessible entry point for beginners, thanks to the Arduino Integrated Development Environment (IDE). The Arduino IDE simplifies the programming process, allowing users to write code in a C/C -based language and upload it to the ATMEGA328-PU with just a few clicks. This section of the ATMEGA328-PU is particularly appealing because it demystifies the process of microcontroller programming, making it accessible to a broad audience.
Programming ATMEGA328P with Arduino
The process of programming the ATMEGA328P with Arduino involves several key steps:
-
Setting up the Arduino IDE: First, download and install the Arduino IDE from the official Arduino website. This software is compatible with Windows, Mac OS, and Linux.
-
Connecting the Arduino board: Connect your Arduino board, which houses the ATMEGA328-PU, to your computer using a USB cable. The board is automatically powered through this connection.
-
Selecting the right board and port: Within the Arduino IDE, you'll need to select the correct board (Arduino Uno) and the port that the board is connected to.
-
Writing the code: Use the Arduino IDE to write your code. You can start from scratch or modify existing examples from the extensive library provided by Arduino.
-
Uploading the code: Once your code is ready, click the "Upload" button in the IDE. This compiles the code and uploads it to the ATMEGA328-PU, bringing your project to life.
Mastering I2C Communication with ATMEGA328P
The ATMEGA328P supports I2C (Inter-Integrated Circuit) communication, a serial protocol that facilitates data exchange between microcontrollers and various peripherals, such as sensors, displays, and other microcontrollers. Utilizing only two wires (SDA for data and SCL for clock), I2C simplifies connections and enables communication between multiple devices, making it an efficient choice for complex projects.
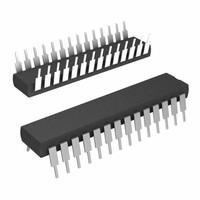
Understanding the ATMEGA328P Pins
The ATMEGA328P boasts a versatile pin layout, featuring a mix of digital and analog pins that can handle various functions. Here's a quick overview:
- Digital I/O Pins: These pins can be configured as either input or output, allowing the microcontroller to interact with a wide range of components.
- Analog Input Pins: Dedicated to reading analog signals, these pins are crucial for interfacing with analog sensors.
- Power and Ground Pins: Essential for powering the microcontroller and establishing a common ground in electronic circuits.
- Special Function Pins: Including pins for I2C, SPI, and UART communication, these enable the ATMEGA328-PU to connect with other microcontrollers and peripherals.
Conclusion
The ATMEGA328-PU is more than just a microcontroller; it's a gateway to the fascinating world of electronics and programming. With its support for Arduino, I2C communication, and a versatile pin layout, the ATMEGA328-PU equips enthusiasts and professionals with the tools needed to create a wide array of innovative projects. Whether you're building your first LED blinker or designing a complex sensor network, the ATMEGA328-PU is a reliable and powerful companion on your journey into electronics.